RSS
Showing posts with label stamping. Show all posts

Going Places - Meadow Road

Another one in my Going Places series for my parents! This time I used my brand new Stampscapes stamp. (I could really get into those!!!) Since I'm not a millionaire, I only bought 1 (man they get pricey!)

This place, isn't really representative of anywhere special, I just thought it was pretty!


So you want details huh? Here ya go ...

The Stampscapes stamp was stamped in Basic Black (stamped off once) twice right next to each other, (can YOU see the seam??? ;) ) LOL I can, but only because I know where to look! Then I colored it with my SU markers and I sponged the color on the grass and sky. (Oh btw: ripped paper towels make GREAT could templates!) I must have used every green SU makes to do the grass part, but I think it has a lot of depth. All the tree trunks are Chocolate Chip and the main trees are in Artichoke. Since the RV was WAY out of proportion, I needed a way to make it smaller. The gal at the stamp store yesterday suggested I stamp it on shrink plastic. Hmm ok, that's a thought!

So I stamped it on white shrink plastic and colored it (carefully) with Copic, Sharpies and SU markers. I say carefully, because the Copic will make the Stazon bleed and the SU will smear if you touch it before you shrink the plastic, once it's shrunk, it's ok :)

After I shrank the RV with heat gun, I ran it through my Xyron X, but I decided I wanted more holding power than the X could give me, so I put a strip of red liner tape on the back. Now that sucker is good and stuck!

The trickiest part was on the card itself. After I trimmed the focal piece and mounted it on Not Quite Navy CS, I wanted a simple yet effective way to display it on the card. I didn't want to distract from the focal piece (since I spent all morning making it LOL!). So I decided to stamp the Stampscapes image in Sahara Sand on the Sahara Sand card. Great idea, simple right?

WRONG! I had trimmed part of the focal piece before I mounted it, so it wasn't like I could just stamp the Stampscapes stamp and be done with it, nope, I had to stamp it on my imaging sheet for my Lego-ma-jig, then line it up with the focal piece BEFORE I adhered the focal piece, then remove the focal piece without disturbing the Lego-ma-jig, then stamp the Stampscapes stamp. And then do it all over again for the other side!!! Whew! But I LOVE the results!!!

Stamps: RV - Copper Leaf Creations, Stampscapes - Meadow Lg, Sentiment - Inky Antics
Paper: WW, Not Quite Navy, Sahara Sand
Ink: Always Artichoke, Old Olive, Going Gray, Bashful Blue, Not Quite Navy, Night of Navy, Bordering Blue, Garden Green, Chocolate chip, So Saffron
Accessories - SU Markers, Copic Markers, Sharpies, Micron pen,

Going Places ... Wisconsin maybe?

LOL I crack myself up sometimes. I was looking through my stamps to see what else I had to make a scene for the RV to be driving through and I saw Very Punny and the cow just happened to be pretty close to the right proportion (it's a bit big, but that's ok). So here's the latest in the Going Places series.


I made this the same way I did the other 2, although there was a LOT more cutting and masking with all those fence pickets. Oy! That was tedious!

Oh and yes, there is one brown spotted cow! When we were kids we'd play a game while traveling, "Spot the Guernsey in the field of Holsteins" The dairy farmers would have a couple of Guernseys to help increase the fat content of the milk. So we made a game of trying to find them. OK so we were weird! Hey, cut me a break, this was before "Game Boys" and even "Sony Walkmen"! So that's the back story as to why I had to make one cow brown and white.

Hmm where will Mom and Dad go next? Stay tuned to find out ;)

Stamps: RV - Copper Leaf Creations, Fence - A*Muse, grass - Stampendous (Calendar Chick clear set), Trees - Lovely as a Tree, Sentiment - Inky Antics
Paper: WW, Not Quite Navy, Sahara Sand
Ink: Always Artichoke, Old Olive, Creamy Caramel, Going Gray, Bashful Blue, Not Quite Navy, Night of Navy, Brocade Blue, Bordering Blue, Garden Green, Close to Cocoa
Accessories - SU Markers, Sakura Glittler pen, Micron pen,
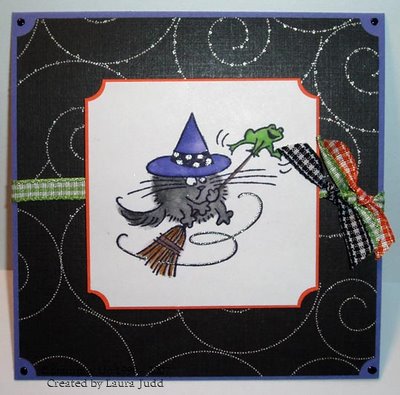
A&A Card Front Swap


I joined a swap, I don't usually, cuz I've been burned in the past. I put my heart into making really great cards and I tend to get back crap. I don't mean newbies best attempts, I mean out and out crap. But I decided to go for it this time because of the group of gals involved with this one :)

I won't go into the group, but we are like-minded individuals and the swap focus was to make cards we could send to our friends with the same ideals. Most will go a humorous route, but I chose a more serious direction.

I found this stamp at Viva Las Vegas Stamps. I LOVE the sentiment: "Live your life so that your children can tell their children you stood for something wonderful." No matter your beliefs, I think this is good advice!

I made the card front just smaller than a normal card, so there's a border around the card front when mounted to the base. I would suggest a Mellow Moss or Vanilla base for this card :)

The flowers were colored with markers and then stamped on the oval pieces. I think next time I will stamp the images first and then punch out the images, as not all my flowers are in the middle of the oval. Not that anyone else will notice, but I do and it bugs me! LOL The bottom piece is Mellow Moss with Paisley stamped in Always Artichoke ink. Because this was a swap, I stamped the full 1/4 sheet and cut them in half. Mellow Moss Gingham ribbon and 2 antique brads complete the card front :) I really like how it turned out!

Bundle of Baby

For today's Limited Supply Challenge. LSC108

Make a gender neutral baby card :) Well that worked out perfectly :) I just watercolored this little guy last night before I went to bed. Either I'm psychic... or I just really wanted to use my new stamp set, you decide ;)


I tried to make the "ground" look like a blanket. At first I stamped it with Flannel Plaid, but since it's on watercolor paper the plaid just didn't take because of the texture, so I played with the watercoloring until I had it pretty close. I'm going to have to try the Flannel Plaid idea on WW sometime, I think it will be neat.

To be honest with you, I HATED Fontastic when I first saw it in the catty. I just couldn't see the what I'd use it for, but then SCS struck again and all those talented artists showed me just how wrong I had been! It's a great background for kid and baby cards!

The little ribbon detail was kinda fun to make. It's just 2 pieces of ribbon, each folded and then stacked on each other, then I poked a little MM saftey pin thru the layers and a cute little embellishment is born!

To finish off the card I took a page out of PineFeather's book and used the craft white to DTP the edges. It softens the card perfectly, just right for a new little baby!

Oooo SCS has a new challenge!

It's the Featured Stamper Challenge. You can read more about it here! Featured Stamper

This week was Kurtis (krabearkub)! He's one of the few male stampers on SCS and he does some amazing work! Go check it out!

Krabearkub's Gallery

I had so much fun with this challenge I made 2 cards!

The first one was inspired by this card Diamonds and Windows

The challenge was to CASE the card, but to change at least 2 things about it. I changed the stamps, colors, ribbon, punch shape etc... but the inspiration is still obvious (I think!)


Stamps: A*Muse scalloped circle, Awareness, Karen Foster Snap Stamps
CS: Pretty in Pink, Shimmery White
Ink: Regal Rose


Then the other card I was inspired by was this one. Scalloped Thanks

I loved the crisp clean look of this. I really liked the colors Kurtis used, but we had to change something, so I changed the colors and since I didn't have the same flower stamp, I changed that too. I also popped the flower part up with mounting tape. This is a serious contender for my shoebox swap card!


Stamps: All Year Cheer, Island Blossoms, IBB (Itty Bitty Backgrounds)
CS: Chocolate Chip, Sahara Sand, Cool Caribbean, So Saffron, Certainly Celery
Ink: Close to Cocoa, Cool Caribbean, So Saffron

Masking Tutorial

Well I got SO many comments on my VSN pre-challenge card about my masking, I thought I'd do a tutorial about it!

Masking is a great technique for creating scenes on your cards. The basic idea is to stamp the front images first and then move your way backwards, by masking off the front images. It doesn't take a lot of time, but you do have to be careful when creating your mask.

Here's what you need: Stamp-a-ma-jig (Lego-ma-jig in my case ;) ),imaging sheet, stamps, post it notes, micro-tip scissors, ink and paper.


First stamp your images on the post it notes, making sure you stamp them over the sticky edge.


Cut out your masks, being careful to cut right on the line or even slightly inside it. This is THE most important step to successful masking. If you cut out the image and leave a space outside of the line, you will have a "halo" around your image.

(Note: I only had to make sure the top of the cow was cut out, because that was the only part that needed to be covered.)


Now stamp your images on the imaging sheets.


Start stamping the images you want in the very front of the focal piece. I used the Lego-ma-jig to help me get them straight.


Once you have the whole front row finished then put the masks in place.


Using your stamp-a-ma-jig line up the first image in your second row (or the next one back in your picture).


I only made 3 masks of the cow, so I needed to move them as I worked my way across.


Once you have all you images in place, remove your masks. Some people save them by putting them on top of the sticker on the back of the wood block. Personally I don't think it takes too long to cut them out, so I don't save mine.


Color your image!


Finish your card! I made another version of my pre-VSN card. I think the "waldo" is a little trickier to find in this one than the last one, but it's still very easy to find!


*** I got a question about my imaging sheet, so I thought I'd answer it here :) I am the Queen of "if something works that's cheaper than the "normal" item, use that instead" Hence the Lego-ma-jig. The imaging sheet is actually the plastic backing that came with a set of Rusty Pickle alphabet stamps I bought (on clearance of course *wink*). It's big enough for almost all my stamps, so I saw no need to buy a "real" imaging sheet. LOL ***

Stamp Cleaners - Which one?


Well, there are SO many stamp cleaners on the market today, I thought I'd try a bunch of them out and let you all know the results. So far I have only tried the first 4, but I plan on getting the other 2 this weekend. I'll add my finding on those later. Now I'm judging these based on their ability to clean SU's Basic Black and Stazon ink off the stamps. For water based inks (like SU's Classic inks) I use my own homemade stamp cleaner! recipe to follow ;)

My favorite stamp cleaner by far is the 1st one. Judikins Fabric and Permanent Ink Cleaner! It stinks to high heaven, but it cleans even Stazon off my stamps with ease. Old and new stains alike, it doesn't really matter, it gets them all pretty well. I'm a fan of the dauber top, so that helps it's standing a little bit too. Unfortunately, it's a little difficult to find. My old lss carried it before they went out of business and I've used all I bought from there :( I did find a place to order the LARGE jug, but I haven't ordered any yet. Price about $3

My next favorite is the Ranger Solvent ink cleaner (red bottle). This one stinks too, but not as bad as the Judikins. This one will get the ink off your stamps if the stains are pretty fresh, for the older stains, it does ok. Again, the dauber top is nice, I think it helps you use only as much cleaner as you need. I just touch the dauber top to a paper towel to clean it off after each stamp. Price about $3.50 - $4

Now the one that SO many people rave about, Ultra Clean. While this cleaner doesn't stink the way the others do, and it does a nice job (not the best IMHO) of getting the ink off my stamps, I just don't like it. Why? I've found that it's oily. If I get this stuff on my hands while I'm cleaning a stamp, I have to stop and wash my hands before I touch my project again. I don't have time for that! I have ruined too many cards because of oily fingerprints because of this cleaner. It's also a spray, which is fine, I do use a spray bottle for my own cleaner, but for the price, I think you waste more than you use. Price about $5 - $6

Now StazOn Cleaner, it smells nice (like lemons) but honestly it didn't get the ink off my stamps very well. It's also VERY oily and I have to clean my stamps again with a regular cleaner to get the residue off of them. Personally I will not buy this one again. Price about $4

For the last 2, as I said before, I will get them this weekend and let you know what I think. I have heard good things about both, but I also heard fantastic things about Ultra Clean and it turns out I don't really care for it, so we'll see!

Ok for the regular stamp cleaner recipe:

1 gallon Distilled water (pour out about 1/2 cup or so)
4 - 6 TBS Glycerin (ask at the pharmacy counter for it)
and about 3 good squirts of Baby Wash (don't use too much or it gets too sudsy)

Mix this all in the Gallon jug the water comes in and don't forget to label it! I made a batch of this stuff over a year ago and I still have 2/3 of it left. I stamp everyday, so I use a lot! LOL I just put some in a cheap spritz bottle I got at Wal-Mart in the beauty section. Spritz it on my scrubber and away we go!

***I have been asked about Baby Wash. Basically it's just a very gentle soap. You can get a small bottle at the $1 Store if you don't have little ones around anymore. ***

Oh and a cheap alternative to the stamp scrubber SU sells ... paint pads. I can get 2 paint pads for just under $3 and then I can replace them when they get stained and nasty. I just clean them in the sink with regular soap and let them dry after each stamping marathon. Yes, they do "shed" a little bit, but only until they've been "broken in" for a few days. I bet I could take them to the sink when I first get them and scrub them until they don't "shed" anymore. I'll have to try that, it's about time for a new batch anyway!

Multi-fold Holiday Card

This was for today's sketch challenge on SCS. SC94 I used the vertical version so it would go with my Ornamassortment set! I love the way the card turned out, BUT I should have thought it all the way thru before putting it together.

I should have done the gold "stitches" before I put that layer on, because now it's just messy :( I like the way it "should" look LOL What happened was that I got it all done and the focal layer looked too plain to me. So I added the rhinestone to the center ornament, and that helped a little, but not enough. So instead of making a new card, I thought I could "fix" this one. UGH big mistake LOL. I'm too much a perfectionist to be happy with the stray EP flecks.

Ok enough complaining :) I do LOVE the way the Happy Holidays and the All in a Row turned out! I really think I'm going to like having All in a Row for adding little touches like this.

I'm going to need more Cranberry Crisp if I keep this up! I've been using it like crazy lately! Not that that's a bad thing *wink* It's a great color!

Ok, vent time. there's a new discussion on SCS about the "In Colors" and if you should get them, knowing that they'll only be around for a year. I think that if you like something, and can afford it, get it! Don't let the limited availability enter into your thoughts. If you go by that, then you won't buy ANY stamps because they "might" retire them at the end of the year. To me that's just silly. But then again I'm not a demo, just a happy customer who loves her stamps, CS and inks. I love the fact that SU is trying to keep up with the current color trends. So what if I can't get the CS after this year, I'll just have to make sure I buy enough to last me for a while *wink*.

Ornament Greetings

I was browsing blogs the other day, looking for inspiration for my Shoebox swap card, and I think I've found it!

I saw a card on Keri's (Sereikastamper) blog and knew I just had to try the sketch out! I love how it turned out! This is the card I'm going to use for my swap card.

There's only one detail to work out, do I buy the scented Embossing powder from CHF (The vanilla scented and colored one.) for the sentiment? Or do I leave it as-is with the Saffron craft ink?

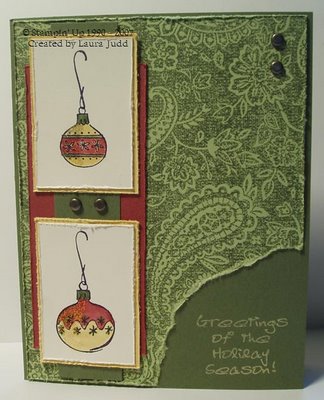
OK the details :) The card base is Artichoke, and the Paisley background is stamped in Artichoke on Celery paper. The images are stamped on VV and then watercolored/colored with markers (the cranberry is done with a brush). The other colors are Cranberry Crisp and So Saffron. I added some stickles to the edges of the ornaments for some *bling* :)

I just got both these sets the other day, and I LOVE them! Paisley is going to quickly become one of my favorite backgrounds! I can see myself using it on everything!

Coal Again?


OK I admit it, I LOVE Fluffles! BUT, I only really like the tongue-in-cheek ones! I saw this guy at the store and I had to have him!

I belong to a Yahoo group called Scrappin' Sailors. We scrap, we curse, we laugh, and we don't take life too seriously! It's a great group of ladies. We decided to do a non-religious Christmas card swap, so this is the card I'm doing! I think it's perfect for our little group of misfits! Everyone in it deserves at least one piece of coal this year *wink*

I also LOVE non-traditional colors for Christmas. My own tree/house gets decorated in Blue and Silver! So anyway, I used Lovely Lilac, Bashful Blue, & Certainly Celery for the stocking and ornaments, the tree branch is Always Artichoke and Fluffles is done with Creamy Caramel. I used my markers for all the coloring, except for Fluffles himself. I used the Aquapainter and watered down ink for him. It's hard to see in the scan, but I used my Glitter pen to add glitter to the ornaments, the centers of the "Twinkles" and the centers of the "star" stitches. It's really pretty IRL!

Ok another new find! Back in June, I had tried to get the CTMH Simple Stitches SOTM set, but my demo waited a bit to long to put in the order and it wouldn't go thru. (Long story, but I wasn't too happy with CTMH at that point!) Anyway, I still wanted a stitches set, but never really looked into them. I was at the lss the other day, with a full punch card. That meant I "had" to buy $30 worth of product and I'd get it for 50% off! Woo Hoo! Gotta love "deals" like that! So anyway I saw these stitches by Technique Tuesday, I grabbed them up! LOVE them! They're a little short, but since they're clear, it's pretty easy to line them up.

Scenic Fall

Have you ever had an idea for a card you wanted to make, and couldn't make it fast enough? That's what happened with this card! I saw a digi LO in the new Simple Scrapbooks that just caught my eye and I thought, "That would make an AWESOME card!" So off I went to my scramping table (stamping/scraping)to play!

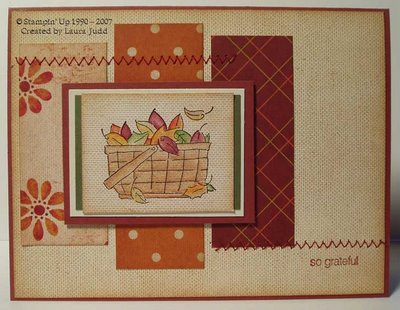
I started with the PP this time. I don't usually, but I have had this Scenic Route paper for over a year now, and while I LOVE it, I just haven't used it. So it was first, then I looked thru my HUGE binder of WRAKs to find an image that would go nicely with the Fall colors on the paper. What better than Autumn leaves in a basket? Nothing! LOL SO that was next. Out came the trusty Prismacolor pencils and OMS, my favorite coloring medium.

I love the Linen on the background and on the PP, but I'm a little disappointed with myself for adding it to the focal image. See the leaves were stamped on WW paper and I had used VV for the rest of the card. SO the focal image needed some toning down. I sponged the edge ala SweetMissDaisy, but it wasn't 'quite' enough. Even with stamping off once, the linen turned out to be a bit too heavy, oh well.

I might re-visit this design when my Paisley stamp gets here. I think it would look fantastic!

The Secret to Happiness is ...

a good sale!

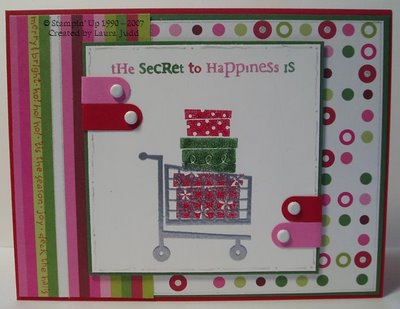
This is for the Ways to Use it Challenge on SCS for today. Glitter! It's really hard to see in the pic, but there is glitter on the gifts, on the words, around the main image, in some of the dots on the background and along the edges of the papers. It's kinda subtle, but it's there!

If you haven't noticed, my goal this week is to use stamps/sets that have been collecting dust. First I used the Wheelbarrow from The Wheel Thing, then the chair from A Little Love, and now the shopping cart from The Wheel Thing and the gifts from Cool Cat (this is actually why I bought Cool Cat! LOL)

Nothing too fancy about this one, Just a lot of the Sakura Glitter pen, LOVE that thing! Word Window punchies thanks to Sarah! I used the last of my fantabulous KI Memories paper :( I hope I can get some more from the lss. I just love the colors in this collection!

One thing to note, interesting things happen when you emboss over embossing! I had done the gifts first, and embossed them with my homemade Iridescent Ice EP. Then I stamped the cart with Versamark over top and embossed with Silver EP. The parts of the cart that went over the gifts are still silver, but it kinda blended into the existing EP.

A Fairy Get Well Wish


Ink it Up's DD is having surgery tomorrow, and Keri asked the WRAK'ers to flood her DD with get well cards. She said Addie loves anything sparkly, I think I got that part down pretty well! *wink*

I got the fairy as a WRAK and I thought it would be perfect for a Get Well "Wish" :) She is colored using a paintbrush and ink. Then I added some Stickles all over the background as well as on her dress. The wand is a little adhesive backed rhinestone I found at Hobby Lobby. She's popped up with mounting tape. I've found I like mounting tape better than pop dots for these larger areas. The small pop dots don't give enough support to the piece and then it ends up sagging once it's gotten to it's destination, not good!

The background is stamped with Gable Green craft ink and then I used homemade Iridescent Ice EP to add LOTS of sparkle! I stamped the Pixie Pink strip with the star stamp from Background Basics and also used my II EP :) I love the poked strip that atomicbutterfly uses, and I thought I'd give it a try here :) I think I like it! Although I had to weigh down the CS layers so the glue could cure. It kept popping up and wouldn't stay stuck! Out came the big ole' binder and let dry for a couple of hours, now it's stuck! LOL

Frankie Goes Trick or Treating!


I LOVE this guy! Actually I love all Halloween stamps! But this guy just makes me laugh, with his belly sticking out and his "I love Bats!" shirt, I just can't help but giggle when I see him!

So I was talking to Anna (SweetMissDaisy) last night, and we were discussing the Shimmer paper. I admitted that I had never used the few sheets I have (I don't want to mess up since I only have a few sheets :( ) and she told me that I had better get busy and try them out! LOL So figuring it was National Card Making Day, AND Anna's birthday, so I had better listen and make a card! LOL

I stamped Frankie on the Shimmer paper with Stazon (my pad is getting dry, so he kinda looks grayish instead of black :( ) Then I colored him with Prismacolor pencils and used the Magic Pencil technique, Gamsol or Odorless Mineral spirits are used with stumps, to blend the colors. I love this technique for coloring and I really need to invest in a larger set of pencils, but that's another blog entry! LOL

I stamped the Linograph in Old Olive on WW and then using my Elegant Eggplant marker, I colored in the little "flower petals". Then I dotted the centers with the Signo white gel pen.

The bat was an after thought, I wish I had thought about adding him earlier. I would have stamped him on the Shimmer paper too and then just cut out the top of the wings, rather than cutting him out all the way and having to lost some detail, because I can't cut that small! Oh well, something to remember for the next time :D

Basic Grey Chipboard Mini Monos


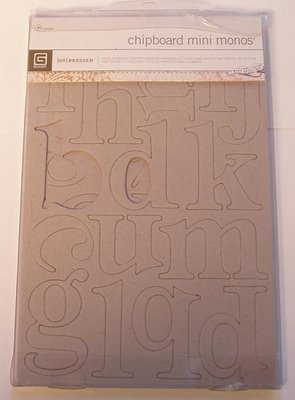
I just picked up a pack of these for a project I was working and I didn't realize that they were self-adhesive. So I'm thinking, "I'll give it a try, but I'll prolly need to use glue dots or red liner tape to really get them to stick." I have never had luck with anything self-adhesive. So I altered the letters for my project and stuck them down. Well I messed up the one and had to move it just slightly, so I tried to pull it up to move it over. First off, it wouldn't budge! Then when I finally got an edge up, it split in 2 LOL! So needless to say, these things REALLY stay stuck! I was able to fix my boo-boo, and the project looks great!

For the price, I'm really happy with these! They were under $6 and there are 81 pieces! Nope, I'm not getting paid to blog about this, just really happy with a purchase I made :) I wish all my impulse purchases ended up this good LOL!

I'd post the project, but the person it's for reads my blog, and I don't want her to see it until she gets it ;) So ya'll will have to wait too! Hehehe!

Fluffles!

I did it, I jumped onto the Fluffles bandwagon! So many people were doing SUCH cute things with these guys, I had to try them for myself. SO I asked for Fluffles images on the Wish RAK group. I got a ton of everyday and some Christmas ones, but I didn't get either of these guys. So what did I do?? I went out and bought them for myself ;)LOL

Now I'm not one to send Thanksgiving cards, but I was laughing SO hard when I first saw this stamp, that I knew I just HAD to make a card with it! My step-MIL has like 7 cats, so I think she may get this card, just cuz she can relate! LOL

I had seen some other people doing up the Linograph stamp this way, with the Signo gel pen and the stickles, and I just fell in love with the look! I think it adds SO much to the card.

The scallop oval is of course the Giga punch from Marvy, but the larger plain oval was cut with the CM cutting system! I was so excited to find that the proportions of the CM ovals fit the punches perfectly! I have no idea why Marvy didn't think of that when they designed their solid punches, but it bugged the heck out of me that they were not "just right". So now, I'm a happy camper and can have solid ovals to fit my scalloped punches :)

This card was so easy to do! Fluffles is colored with markers (except Fluffles himself, he's done with watercolor crayons)I used my new Sakura Stardust pen to add glitter to the hat and the swirl under the broom. I also dotted the Chatterbox paper with the Stardust pen to give it more sparkle! I'm not sure why I waited so long to pick up one of these pens! It's so easy to add just a touch of glitz to any card! The little black dots in the corners are done with the Sakura Glaze pen. Another little gem of a pen!

Another new favorite supply of mine has to be the ticker corner punch from SU! Yes you can use a circle punch and carefully look where you're punching to get the same look, but it's SO much easier with the SU punch. Just another little thing that adds SO much to a card!

New and Improved Color Combo Site!


It's finally up and running! My NEW and Improved Color Combo site!

The functionality is all the same, we've just made it easier to use and to see what colors you are choosing. The new "In Colors" have been added as well as some combos to start you off!

I haven't gotten all the old combos transferred to the new database yet, and I probably won't add all of them. There are too many fluke combos in the old database. I will add all the 3 and 4 color combos, just not the 5 color combos.

********************************************************************

OK so for the changes:

The biggest change is the addition of the In Colors and the removal of the colors that retired 2 years ago.

You now can only choose a color once. This way we won't get duplicate entries in the combos.

You may only save 3 colors or more. If you want to add a 2 color combo, add white to it :)

The colors are computer generated to make it faster for the database to run. Therefore, they might not be exact to the SU colors, but I have tried really hard to get them as close as possible.

We changed servers so that we could use a real database. But the new domain is not free like the old one was, so there is a donation button. It is totally optional, and I will NEVER charge for this site, but it does cost me money to have it up now, so ...

The new URL is

http://www.scraptitude.com/colorcombo/

We will have it automatically redirect you from the old site after we've added all the combos! But please update your bookmarks!

*************************************************************************

If I think of something else, I will add it, but for now those are the biggest changes!

I'm really glad everyone loves the idea of this site and DH and I would LOVE to hear your feedback on the new version.

HUGE thanks go out to Sarah for helping me enter the combos from the old site!

Vintage Violet


There's been lots of talk about this new "In Color" from SU. Some people love it and have been using it with everything from Almost Amethyst to Black and Very Vanilla. Personally I like the color. Now it's not my favorite of the new In Colors, but I do think it's ok from the little I've played with it. I'll have to play with it more to really form an opinion about the color.

What do you think? Do you love Vintage Violet? or hate it?


I think this is one of my favorite combos using Vintage Violet.

Vintage Violet, Sage Shadow, Certainly Celery, and Bordering Blue

It's so soft and gentle. Some other combos that I really like are:
Vintage Violet, Marigold Morning, Bashful Blue, and Always Artichoke
Vintage Violet, Almost Amethyst, Very Vanilla
Vintage Violet, Cranberry Crisp, So Saffron and Always Artichoke

I think the trick to this color is that it needs a brighter color to balance out the muted hue. The brighter color seems to enhance Vintage Violet.

Going Batty


For the Limited Supply Challenge on SCS this week, we were supposed to make a card using Halloween images, but use a non Halloween sentiment. I just love my Karen Foster Snap Stamps for things like this! I used both the 1/4 inch and the 1/16 inch sizes.

SO to toot my own horn... Rob actually gave me a HUGE compliment on this card. Usually he barely looks at the card, flips it open to see inside (even though I've told him a thousand times they're blank inside) and hands it back saying "that's nice". So when he looked at this card and said "Wow, I think that's the cutest card you've made in a while". I was shocked! LOL That's a HUGE compliment from him.

It's coming back...

My mojo that is :) Lately I've been buying more than I've been stamping, but in the past 2 days I've made 4 new cards! I'm so happy to be stamping again!


I'll start with the 1st card I made with the SU Heart Association set; A Light Heart. My MIL bought this set for me. I made this to give to her when we get together this weekend.

It’s really pretty basic, but I've found that's the best way to get your mojo back, start simple! I used the CHF (Cornish Heritage Farms) Paisley stamp in Really Rust on the Pumpkin Pie layer and then over stamped it with SU's Linen also in Really Rust. I think it gives a similar look to the new SU Paisley. The Hearts are Really Rust, Old Olive and Pumpkin Pie. The layout has been used on SCS a lot.


Next card is made with images I received from the IRAK group on SCS (I'll talk about that group later ;) ) Of course ever since I got the first set of Linograph images from the IRAK group, am kicking myself for not buying it before it retired. Now I really like it! LOL oh BST forum here I come!

So I colored the Penny Black chicken with markers and also with the aquapainter. I just love all the different colors of gingham ribbon you can get now! Last year I was looking for Orange gingham around this time of year, and it was almost impossible to find, so when I did find it (after Halloween of course) I bought 3 spools ;)


This one I'm not "in love with" but it's ok. I guess I'm not sure I like the whimsical image with the elegant paper and stamps. The image is colored with Prismacolor pencils and blended with odorless mineral spirits. I used Linen and French Script on the second layer and Linen on the card base. I do like the rivets I used. When I went to put that layer on top, the rivets were too thick even with using pop dots, so I took the backs off and they fit much better. I just hope they don't fall out of the holes. LOL I doubt it though. Lots of distressing on this one as well; I think it really fits the fall theme.


Last but not least, my favorite card of day. I LOVE the Wild About You set! It's next on my list to purchase (after the Best Fiends and the Halloween stuff in the mini!)I was lucky to get some images from the IRAK group :) So I've been having fun playing with them until I can buy the set for myself!

The card is HEAVILY inspired by a card by Bobbynbrit on SCS. She used a different Basic Grey paper and the Layout is a bit different, but her card was the jumping off point for this one :)

I LOVE the Dotted background stamp! It was the very first thing I bought out of the new catty. It just works so well with the giraffe stamp. The dots on the background mimic the dots on the giraffe and then are echoed again with the 3D dot stickers in the bottom left corner. Ok those stickers were a GREAT find! I found them in the $1 section at JoAnns. They look like brads, but are stickers so the don't show on the inside of your card like brads do. I just wish they made them in more colors!
Welcome to my new an improved blog. I hope you can find something useful, insightful, humorous or just plain silly here. Enjoy!
 
Copyright 2009 Inky Dinky Doo All rights reserved.
Blogger Templates created by Deluxe Templates
Wordpress Theme by EZwpthemes