RSS

Nathan's 1st Birthday card!

My friend's little boy is turning 1 this weekend and I needed a card. The stacked animals were inspired by many cards on SCS as well as the raised lion head and elephant's ear. What's all mine is the ribbon! There was a thread today about making Korker ribbon bows for little girls hair. So not knowing what those were I had to Google it! I found the instructions (I will be making those bows for Christmas gifts!) and I also thought, hmm those curls would be cool on a card. I would think it's best given person to person rather than sent thru the mail, but with enough padding the curls might survive the USPS. *wink*

Here's how I did it:

1. Cut a length of ribbon about 4 - 6 inches.
2. Put some tape runner adhesive on the ends.
3. Wrap the ribbon very closely (but not overlapping) around a dowel (I used a paintbrush handle)
4. Carefully heat the ribbon for a few minutes with your heat tool, making sure you twirl the dowel around to get all sides.
5. Let it cool for a couple of minutes.
6. Remove from dowel and trim ends.
7. Use on your project!

Unmounting your Wheels - tutorial

Ok I admit it, I'm wheel challenged! I can't use them to save my life! Everytime I tried the image was either not fully stamped or it had lines from the edges of the rubber, it was frustrating. I ended up wasting more CS trying to get it right. I don't make wrapping paper or anything that I'd actually *need* a wheel, so one day I got the brilliant idea to unmount them. I'm pretty sure it wasn't my original idea, but it works for me!


Here's what I do:

1. Find the seam in the rubber. On most wheels it's pretty obvious.(pic 1) Take a sharp craft knife (or paper snips) and score through the glue on the seam. It should cut through pretty easily. (pic 2)


2. Carefully peel back one corner of the rubber at the seam. It should come right off. (pic 3)

3. Snip through the remaining rubber on the seam.


4. Pull the rubber off the wheel. Ususally the adhesive remains on the wheel and the rubber comes off clean. But sometimes some sticky is left. (pic 4)


5. If there is sticky left, just rub it in one direction until it all comes off. (pics 5 & 6)


6. Sometimes I trim the rubber first before mounting it to the EZ Mount (Smart Mount from CHF)It helps to get it trimmed nicely. (pic 7)


7. Mount rubber on EZ Mount foam carefully, making sure to keep it straight. (pic 8)


8. Use Baby Powder to coat the sticky if there is any left.(pics 9 & 10)


9. Trim the EZ Mount around the rubber making sure not to undercut the foam.


10. Clean your newly mounted wheel stamp!


11. Now mount your newly unmounted wheel on the storage system of your choice. I use the binder sheets from Sunday International. They also have an acrylic block 2" x 7" that's perfect for the jumbo wheels! (pics 11 & 12)

Now you can use your wheel just like a long stamp! You can have your wheels and use them too!

Birthday Brag!

I am one VERY happy person right now! I received some money for my birthday and I thought I would use it towards my SAB purchase, but then I got an email from eBay about a favorite seller. I have been watching this guy for over a year now, just waiting for the time I could order from him. What did I order??? I am getting a Kitchen Aid Accolade 400 watt stand mixer!!!! I have been asking for a Kitchen Aid mixer for 4 years now. Finally we had the money and opportunity to buy it! I'm SO excited! It should be here within a week, so just in time for Christmas cookies!!! I got the Lemongrass Green one, I am hoping to do my kitchen similar to Rachael Ray's in 30 minutes Meals. Right now our kitchen is a blank slate (actually it needs a complete overhaul!) I figured I could get the mixer in whatever color I wanted and design the kitchen to match! LOL A little backwards maybe, but I've wanted to do my kitchen in those colors since I first saw 30 Minute Meals!


Part 2 to my wonderful birthday...
I had asked my FIL and his friend if they could build me an ink pad/marker/reinker storage unit. They enjoy woodworking and I thought they would like the challenge. Well that was months ago. I've been very patient and hadn't said anything until about 10 before my birthday. I asked how they were coming on the storage unit. And Tony says "Well, maybe for your birthday." I said "Oh good, that's in 10 days ;)" LOL Well I guess they hadn't realized that it was that close to my birthday. Anyway fast forward to Thanksgiving. We get back from going to see Casino Royale (great movie btw!)and my FIL and step MIL are there, they give me my birthday card and in it is a printed picture and a note. They said they were sorry for forgetting my birthday and they wanted me to have what I wanted, so they ordered the storage unit for me!!! I can't believe it! So in about a week I'm getting this....


So this year I have had the best birthday I've had in a LONG time. Now I just need the money to fill the storage unit LOL. Actually, I'm about halfway there!

Glitter Ornament Tutorial


Ok here goes, my very first tutorial. I've never written one of these before, but I had so much fun making these ornaments, that I thought everyone should know how! The 1st one is Night of Navy and the 2nd one is Cool Caribbean. I also made one with Marigold Morning, but the picture made it look orange and not very pretty, but it's gorgeous IRL!


First carefully take the metal hanger off your ornament. Then add about 20 drops of reinker. I used Cranberry Crisp for this tutorial. (see pic 1) Then you need to swirl the ink around inside the ornament until it coats the inside completely. (see pic 2) After you have the entire inside coated, turn the ornament upside down so that it can drain into something. I can't tell you how long to do this as it depends on lots of factors, how humid it is, how many drops of reinker you used etc... Just let them drain until there are no more "drips" when you turn it over. (see pic 3)


Ok now you need to use some sort of funnel to add the glitter. I just made one from scrap copy paper. (see pic 4) Add about 1 1/2 teaspoon of ultra fine glitter to the ornament. (see pic 5) Now here comes the fun part! Take your thumb and COMPLETELY cover the opening. (I have tiny hands and I can do this, so you should be able to as well.) (see pic 6) Now SHAKE the ornament. Shake it hard, but be careful not to hit it on anything. You want to shake it and not roll the glitter around inside, rolling it will create lines in the glitter, while shaking it will give a smoother look.


Now you want to have a plastic baggie ready to catch the excess glitter. This is the bonus of this technique. You now have custom colored glitter you can use on other projects! (see pics 7 & 8) Let the ornament dry for a few minutes and replace the metal hanger. Your custom glitter ornament is done! These are so much fun and SO easy to make!

Hoppy Holidays

Hoppy Holidays! This was for todays Limited Supply Challenge on SCS. Make a funny holiday scene, using 2 or more stamp sets.

I used Unfrogettable, a Michael's $1 stamps and the Lily pad from Eureka stamps. I am SO glad I bought Unfrogettable! I was really up in the air about it when it first came out, but the more I use it, the more I love it!

Ok the details, first I stamped the frog and then masked him to stamp the lily pad. Then came the snails, first I stamped the front ones and then masked them and then I stamped the back ones. The pond line was hand drawn as well as the harnesses. I masked off the frog and the back snails when I stamped the trees, just to be sure no stray ink got on them. Everything was colored with Prismacolor pencils and blended with odorless mineral spirits.

The "ice" is Glossy Accents (like Crystal effects) with some Cool Caribbean Glitter on top. The glitter was a by-product from making the glitter ornaments :) Waste not want not LOL! The snow is just little dots of stickles.

Mom update!

Mom had the surgery to remove the cancerous mass today. They removed the mass and a bit around it for good measure as well as the closest lymph node. Preliminary tests show the lymph node is CANCER FREE!!!!!! They still have more tests to run on the mass itself as well as the node, but so far things look really good. No chemo! As soon as she heals from the surgery, they are off to Florida to resume their RV travels. "Just a bump in the road." to quote my Dad.

Thanks everyone for your good thoughts!

Happy Birthday to me!

So Sorry, it's been so long since I posted, but I've had a really trying week. I found out my Mom has breast cancer. She goes in for the surgery to remove the mass tomorrow, so keep your fingers crossed that the cancer hasn't spread to any lymph nodes and she won't need chemo! We always knew this was a possibility since her grandmother died of breast cancer, but I wasn't expecting it. KWIM? Anyway keep her in your thoughts :)

On to happier things :) It's my birthday! Woo Hoo! I get to pick the restaurant we go to tonight. I have no clue where I want to go LOL! Any suggestions?

I had a really nice time this past weekend doing VSN on SCS! My mojo was flowing and I'm really proud of most of the cards I made. I had 4 chosen as winners! Yea me! Nice early birthday present! So here they are, these happen to be my favorites of the weekend too!

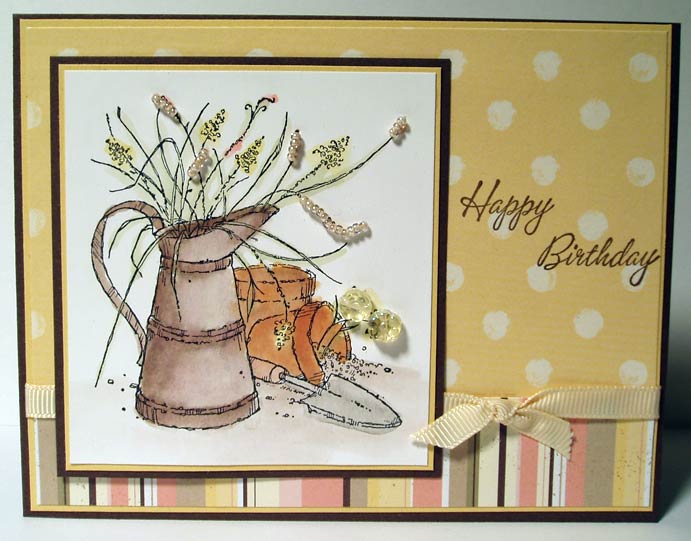
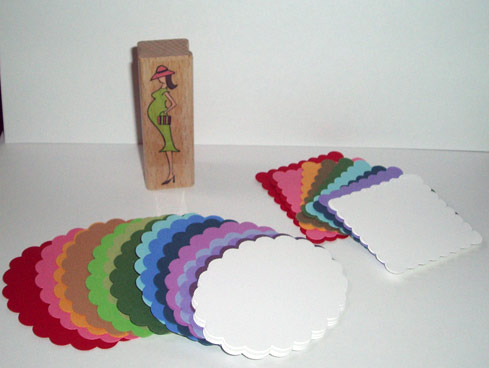
This one just came together perfectly! I don't really have a whole lot of yellow or gold papers, so when I remembered the sheets of designer Sarah sent me, I knew they'd be perfect! I haven't used Long Time Friend in a while so I broke it out and thought, hmmm I have some little flower beads. But when I went to look for the flower beads, I only had 3 in yellow and the right shape. I wasn't giving up that easily. I was a beader in a previous crafting life, so I knew I had TONS of beads in this house. I found the rosy pink seed beads and sewed them onto the card to look like the flower sprigs. I really love the look!


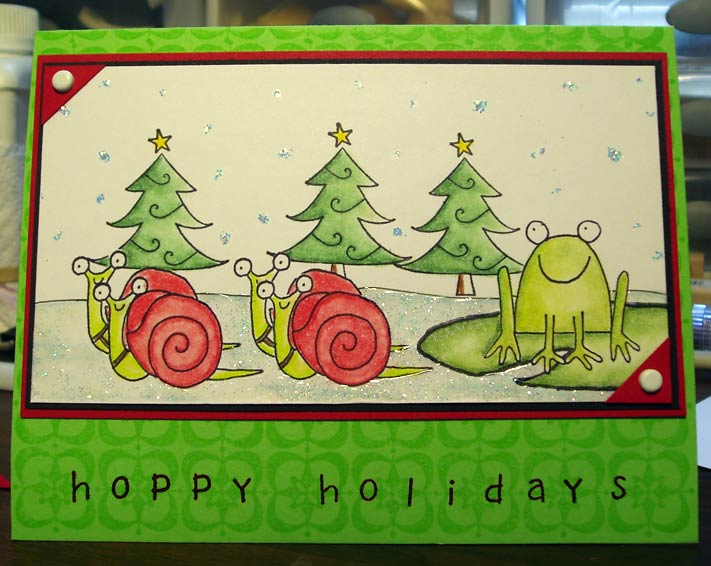
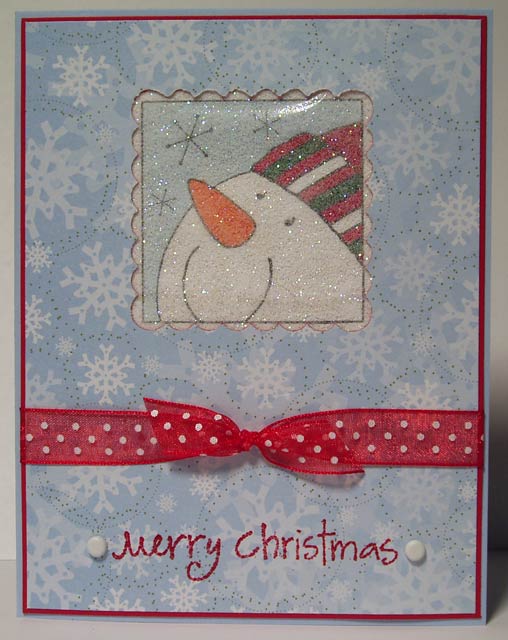
I just love these stamps by Stampabilities. This Snowman is SO cute and I knew he'd be perfect for the Glitter window card. I also knew that he fit perfectly inside the scalloped square punch I have. What I didn't know was that the packing tape is not quite wide enough to span the hole left by the punch. Hmmm what to do. I ended up overlapping the tape slightly , I should have overlapped it a bit more, but it turned out just fine :) This color combo is quickly becoming one of my favorites for Christmas! The sentiment is a Michael's $1 stamp that's been embossed with RED EP. I love it, it's so crisp against the blue background paper.


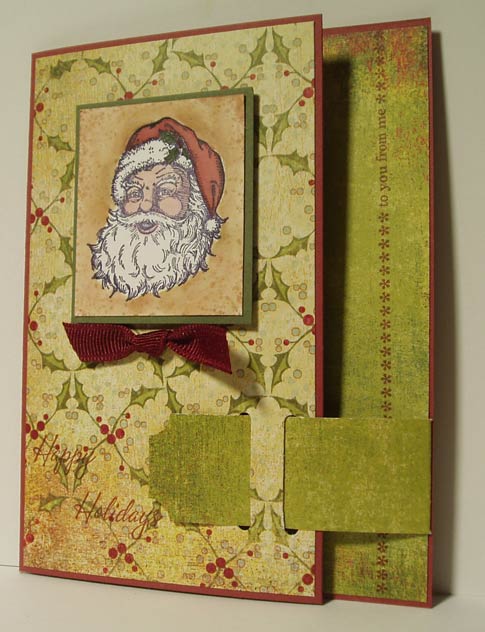
The buckle cards was tricky for me. I have made only one before and I HATED the results. It was just awful, so I was hesitant to try again. But then I looked down and saw my brand new Basic Grey paper just calling to me! LOL So I just HAD to use it ;) I really love the results! I had the whole card made and photographed, but it didn't have a sentiment. So I went back to my table and remembered the All in a Row set. I just love this set, it adds so much to your cards. I just wish I had gotten it straight. Oh well, I still love the card! I did a little creative photographing to make the crooked line less obvious hehehe.


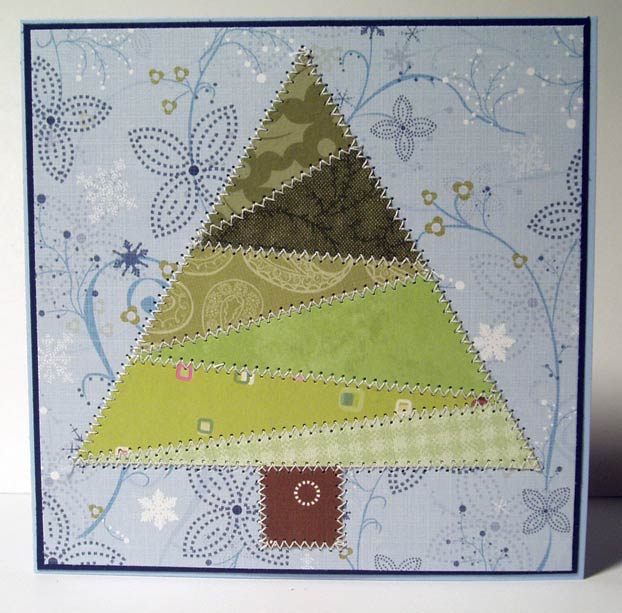
I was also a quilter in a past crafting life, so I have tons of patterns saved on my computer just for quilting. So when this challenge came up I knew just what to do! I found the tree pattern and enlarged it so that it was 5 x 5. Than i printed it out and numbered the pieces and cut them out. I used the numbered pieces as the patterns for my patterned paper. The paper part came together rather quickly. Once I got the pieces cut out, I adhered them to a piece of card stock and then glued that to the background. Then I just set my sewing machine for a small zigzag stitch and went to town. Looking at it now I should have also stitched around the edge of the Chatterbox paper, but I really ran out of time to do much else to it.
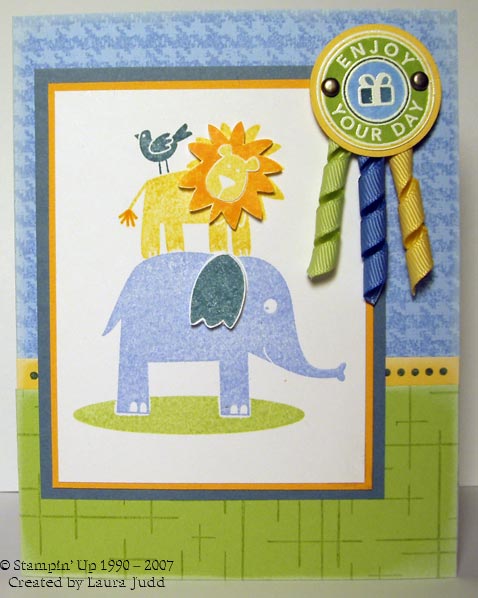
We have a winner! Lucky number 13!

There were 31 comments that counted and I put the numbers 1 - 31 in a bucket and had Kendalyn pick. She thought she was the winner :) Anyway she pick the number 13!

Here's the winning post!

Nicki Lundeen said...

I love your blog. I check it daily. Keep up the good work, and what an accomplishment - 5000 views!

Woo Hoo! So Nicki, Contact me and I will get your goodies out to you soon!

Please stay tuned for more giveaways :) My birthday is coming up VERY soon, so I think I might just have to have another giveaway then. Keep checking back!

5000 views and still counting!

Woo Hoo! I can't believe my blog has hit 5,000 views. Thank you to everyone who stops on by for a quick peek to see what I've been up to! I always wondered "Why on earth would someone care what I am doing? Why would they care what *I* have to say about anything." I started this blog cuz SO many other people were doing it. I know the whole peer pressure thing strikes again, but seriously it seemed like a great way to elaborate on the cards that I've made and things I've discovered in my stamping journey. Someone must like what I have to say, because 5,000 is nothing to shake a stick at! Thanks so much!

Now for the best part :) It's yet another blog giveaway!


I have a Michael's Preggo lady stamp and an assortment of Giga scalloped punch outs to give away. Just leave a comment on this post and I will have my DD pick the winner from a hat.

I can't wait to see who all comes here! Good Luck!

I'll leave the contest open until Tuesday and then DD will pick the winner.
Welcome to my new an improved blog. I hope you can find something useful, insightful, humorous or just plain silly here. Enjoy!
 
Copyright 2009 Inky Dinky Doo All rights reserved.
Blogger Templates created by Deluxe Templates
Wordpress Theme by EZwpthemes